quinta-feira, 31 de março de 2011

Maravilhosamente bem dito...


“Sempre que se conta um conto de fadas, a noite vem.
Não importa o lugar, não importa a hora, não importa a estação do ano,
o fato de uma história estar sendo contada faz com que um céu estrelado
e uma lua branca entrem sorrateiros pelo beiral e fiquem pairando
acima da cabeça dos ouvintes. Às vezes, ao final do conto,
o aposento enche-se de amanhecer; outras vezes um fragmento de
estrela fica para trás, ou ainda uma faixa de luz rasga o céu tempestuoso.
E não importa o que tenha ficado para trás, é com essa dádiva que
devemos trabalhar: é ela que devemos usar para criar alma. "


Clarissa Pinkola Estes

sábado, 26 de março de 2011

Com massinhas e arroz...


  1. Daqui

Borboletando...


Supplies Needed:
  • Double Sided Tape
  • Colored or White Paper (does not have to be thick)
  • 3 Colors of Tissue Paper
  • 3 Pipe Cleaners
  • Pen, Pencil or Marker (you just need the tube part to wrap the pipe cleaner around)
  • Scissors
Time Needed:
  • 15-30 Minutes
What To Do:
NOTE: SAVE ALL TISSUE PAPER SCRAPS UNTIL THIS PROJECT IS COMPLETED. YOU WILL NEED THEM FOR DECORATING THE PAPER.

BUTTERFLY 1:
  1. ADULT: Cut out one 4 inch x 4 inch square from each of your tissue paper colors. You can make them any size but squares seem to look best.
    Once the tissue paper is cut to size see that it's square by
    folding once in each direction and trimming the edges.
  2. ADULT: Cut out one 3 inch x 3 inch square from one of your tissue paper colors. One of your butterflies will have 2 colors this way :)
    One of our butterflies was pink and yellow.
  3. ADULT: Cut 3 inches off one of the pipe cleaners.
    HINT: This method is for younger children (2-3 years). It's the easiest.
  4. Wrap the 3 inch pipe cleaner around the center of the square and twist once. This makes the butterfly body and antennae. If your child can fold the tissue square back and forth (like a fan) three times, have him do that :) There's a lesser chance of tearing the tissue paper that way. Gently spread the wings out.
    Toddlers will feel very proud of these beautiful, yet simple to make butterflies!
    My daughter made this one. You see it's wrinkled but it still looks lovely!
  5. Done with that one :) Use double sided tape on the back of each wing, or just on the back of the pipe cleaner and tape to your paper.
BUTTERFLY 2:
  1. Take your 2nd tissue paper square and fan fold it about 3 or 4 times.
  2. Use the scissor to cut a V shape or a wavy shape on each end of the fan. This gives the edges a pretty look.
    HINT: If you have any fancy edge scissors use those :)
    Cut an interesting edge on each side for a very fancy butterfly!
  3. Take your 2nd pipe cleaner and wrap it around the pen. It should be curly now.
    Use a pen, marker, pencil, straw or other narrow tube!
  4. Place the curly pipe cleaner over the center of the butterfly.
    HINT: Squeeze the center point while the tissue paper is still closed like a fan and put one of the coils over the tissue paper. Then squeeze the coil closed. This will attach the body.
    When it looks like this it's on properly. Now squeeze pipe cleaner
    coil closed around the tissue paper.
  5. Put double sided tape on the back of the pipe cleaner and attach to the paper.
BUTTERFLY 3:
  1. Place the smaller of the 2 remaining tissue paper squares on top of the other one (centered).

  2. Make a fan.
  3. Make 3 small cuts in each of the ends with your scissors. Each cut can be about .25 to .5 inch long.
  4. Take your 2nd pipe cleaner and wrap it around the pen. It should be curly now.
  5. Place the curly pipe cleaner over the center of the butterfly.
    HINT: Squeeze the center point (still closed like a fan) and put one of the coils over the tissue paper. Then squeeze the coil closed. This will attach the body.
  6. Put double sided tape on the back of the pipe cleaner and attach to the paper.
    See the pretty edges on this one?
DECORATION TIME:
  1. Snip up all the little scraps of tissue paper you have.

  2. Place pieces of double sided tape on the remaining blank areas of your paper.
  3. Sprinkle the tissue paper confetti over the tape strips. Press down to make sure they stick.
  4. ENJOY! You're done! No drying time on this one!
  5. Show it off by hanging your masterpiece on the wall!
daqui

quinta-feira, 24 de março de 2011

terça-feira, 22 de março de 2011


E no Dia 21 de Março recebemos a Primavera de braços abertos...ou melhor dizendo...de mãos na terra!
O papá da J. veio ensinar-nos a plantar!
Cavámos, misturamos o fertilizante (que é a comidinha das plantas), e plantámos muitas plantinhas...no fim regámos a plantas com muita água!


No final o pai da J. ofereceu-nos uma flor!
Ficámos tão contentes...e envergonhados também!


segunda-feira, 21 de março de 2011

A Prendinha do Papá!


Ups...escrevi campião em vez de campeão...Atenção:escreve-se CAMPEÃO!!!
Isto não é uma nova alteração da grafia da palavra, por causa do Novo Acordo Ortográfico...hehehehehehehe! Foi falta de atenção MESMO!


Postal
: pintura com cotonete (fundo); pintura com pincel e aguarela (corpo do jogador)

T-Shirt :pintura do rectângulo e impressão dos pés da criança;

domingo, 13 de março de 2011

Um Jardim de Infância diferente... japonês, perto de Tokyo...

AQUI


Vejam e digam-me o que acharam...


1. Os professores eficazes cuidam. Eles preocupam-se com os seus alunos, o seu trabalho e consigo mesmos. Eles tratam os outros com dignidade, que respeite a integridade dos outros. Dão prioridade ao benefício dos outros. Afirmam os pontos fortes dos outros e reconhecem o valor de ser... é uma espécie de amor.

2. Os professores eficazes partilham. Compartilham os seus conhecimentos, ideias e pontos de vista com os outros. A sua vontade de compartilhar é uma forma de vida para eles. Eles não retêm informações para benefício pessoal.

3. Os professores altamente eficazes aprendem. Eles sempre buscam a verdade e significado. Procuram descobrir novas ideias e insights. Eles refletem sobre suas experiências e incorporam a aprendizagem nas suas vidas. Estão dispostos a melhorar as suas competências. Continuam a crescer e a desenvolver-se ao longo das suas vidas.

4. Os professores altamente eficazes criam. Eles estão dispostos a experimentar o novo e o desconhecido, a assumir riscos para melhorar os resultados educacionais. Qualquer coisa que valha a pena fazer, pode valer a pena falhar. Não são desencorajadas por uma falha ocasional; reformulam o erro como uma oportunidade para fazer melhor, como resultado da experiência.

5. Os professores altamente eficazes acreditam. Eles têm fé nos alunos. Confiam nos alunos e estão dispostos a conceder-lhes liberdade e responsabilidade. Eles têm expectativas altas para seus alunos, bem como para si próprios.

6. Os professores eficazes sonham. Eles têm uma visão de sucesso. Eles são movidos por uma imagem de excelência, mais que as suas capacidades inatas permitem. Sempre procuram melhorar, nunca se contentam apenas com o remedeio e a mediania.

7. Os professores eficazes desfrutam. Ensinar não é apenas um emprego para eles, é o seu trabalho. Eles vivem-no com alegria, satisfação, entusiasmo e vigor. E estas qualidades contagiam muitas vezes os seus alunos.

Fonte

http://honolulu.hawaii.edu/intranet/committees/FacDevCom/guidebk/teachtip/7qualities.htm

tradução adaptada


Assim sendo, somente um pedido:


terça-feira, 8 de março de 2011

Tintas com cheiro a banho...


Nas minhas pesquisas encontrei mais uma receita de tintas para crianças.

Mas esta é super-lavável!!!!


RECEITA


1/2 chávena de gel de banho

5 colheres de sopa de Maizena

Corante alimentar de várias cores


Pode-se acrescentar essência de lavanda...ou alguma glitter...

Misture a farinha de milho com o gel de banho. Pode precisar de ajustar a quantidade de farinha, dependendo da consistência do seu gel de banho. Mexa 1 colher de cada vez...

Divida a mistura em vários copinhos ou frascos. Adicione então 2 gotinhas de corante em cada frasco. Misture.

Adoro esta receita...


Agora é tempo de pintar!!!!!!


DAQUI

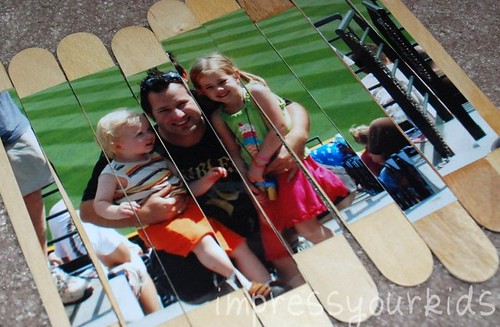
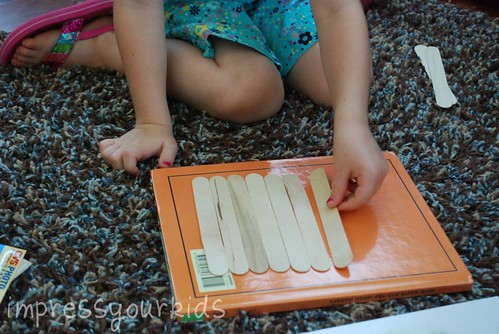
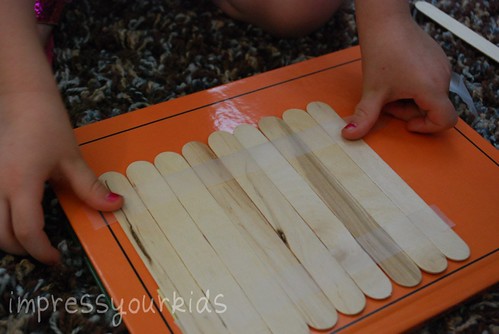
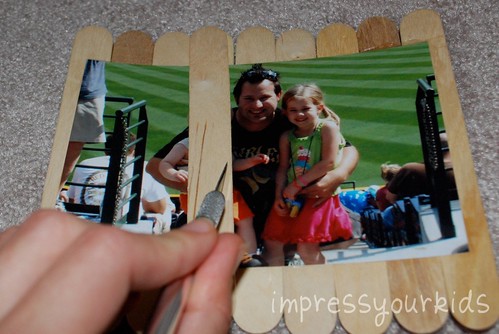
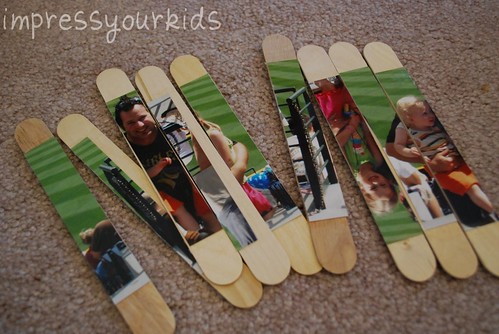
Sugestão para o Dia do Pai...

father's day craft


father's day craft


father's day craft


father's day craft


father's day craft


father's day craft

DAQUI